Creating and configuring products
Create and configure WHMCS products for Qboxmail services, including product groups, pricing, and configurable options.
In this section, you must save the changes made using the “save changes” button after each change.
6.1 Create the product group
Before creating products, you need to create a product group that includes all Qboxmail services.
From the selection menu at the top right, click the setup button and select System Setting. On the System Setting page, select “Products/Services”.
Click “Create new group” and fill in “Product Group Name” with the name you prefer to identify this product group (for example Email Accounts Premium). You can provide more information about the product group by filling in the “Product Group Headline” and “Product Group Tagline” fields.
6.2 Create the first product
After creating the Product Group, you are ready to create your first product.
Click setup > System Setting > Products/Services > click “Create a New Product”
Fill in the following fields as indicated:
- Product Type: Other
- Product Group: The name of the group created in step 6.1
- Product Name: Choose the name you want to give your product
- Module: Qboxmail
- Create as Hidden: Select On. You should hide the product until its setup has been completed. Remember to select Off once the product is ready to be published (go to: “system setting” > “Products/Services” > edit, on the row of the product created > “details” > check the “Hidden” box).
Click “Continue”.
6.2.1
On the product settings page, as the first operation, go to the “Module Settings” tab:
- For “Module Name”, select “Qboxmail”.
- For “Server Group”, select the server group created in step 4.5.
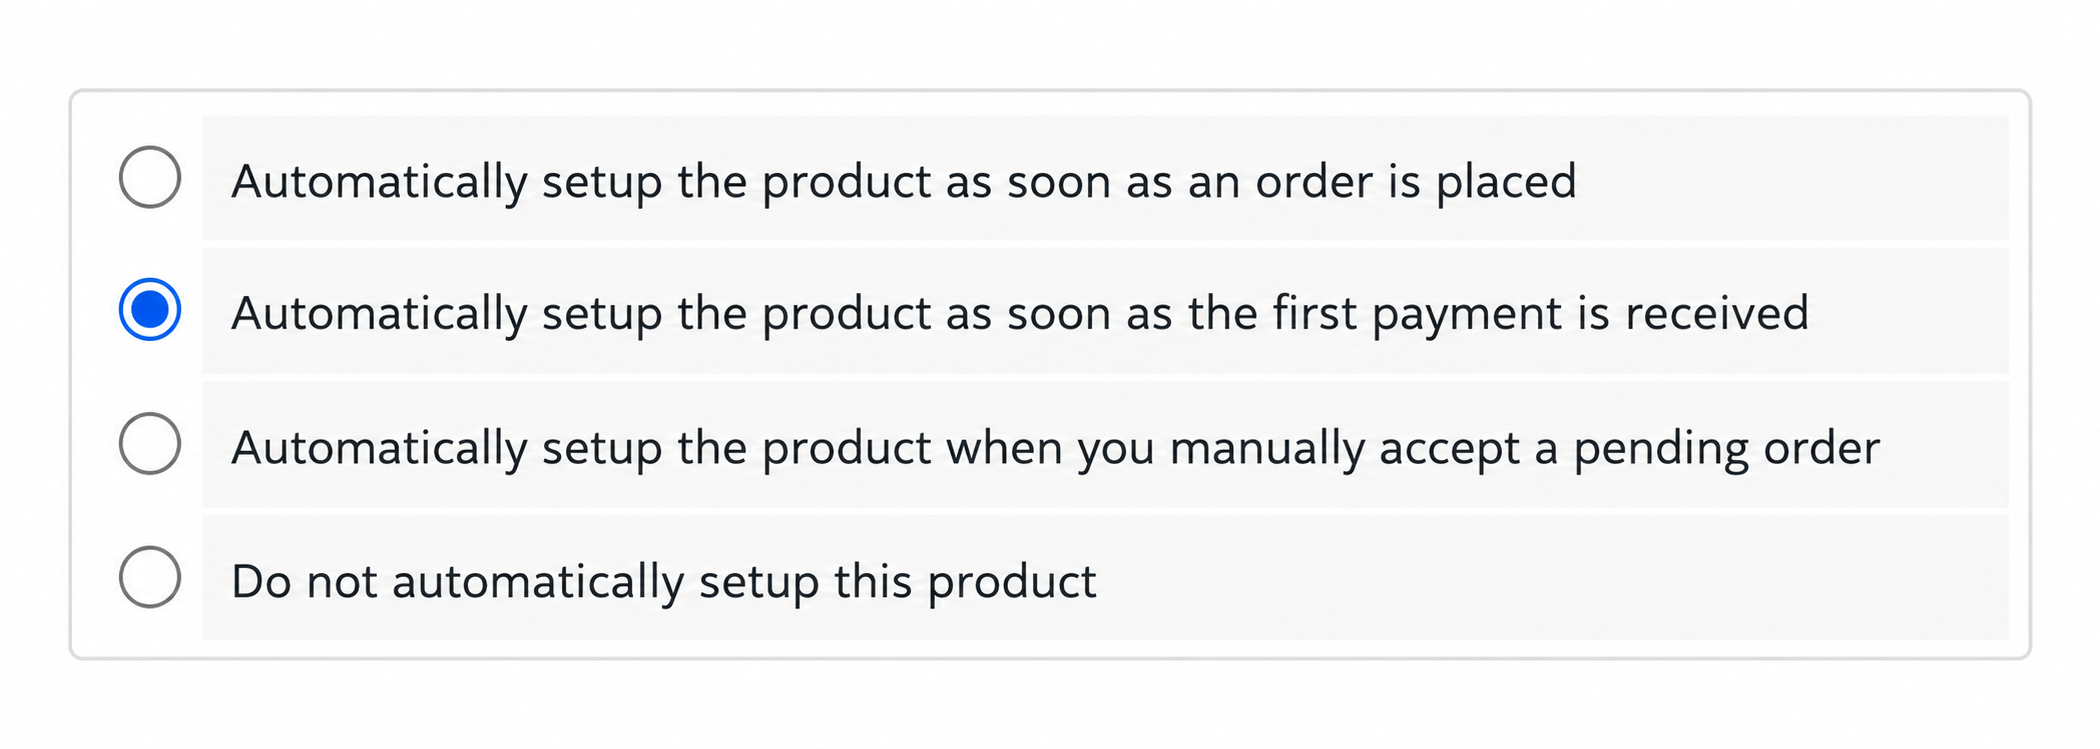
Moving to the bottom of the page, choose when the product purchased by the customer should be activated by WHMCS in the Qboxmail Control Panel. We recommend selecting one of the following options based on your needs:
- “Automatically setup the product as soon as the first payment is received” if you want to create and activate the product automatically once the first payment is received from that customer, without having to manually confirm the order.
- “Automatically setup the product when you manually accept a pending order” if you want to manually check the order and payment before manually confirming the order and therefore activating the product.
- “Automatically setup the product as soon as an order is placed” if you want the product to be activated immediately after the order is placed, even without receiving payment.
- “Do not automatically setup this product” if you want the product not to be activated until the order is manually accepted. In this case, remember to select “Run Module Create” by accessing the order details; otherwise, the module will not create the mailboxes in the Qboxmail Control Panel.
Now return to “Product Setting”. The available options refer to the 3 different plans into which the Qboxmail service is divided. You must therefore choose which of the 3 plans (Basic, Professional, Enterprise) will regulate your product.
In the example, a product regulated by the “Professional” plan was chosen.
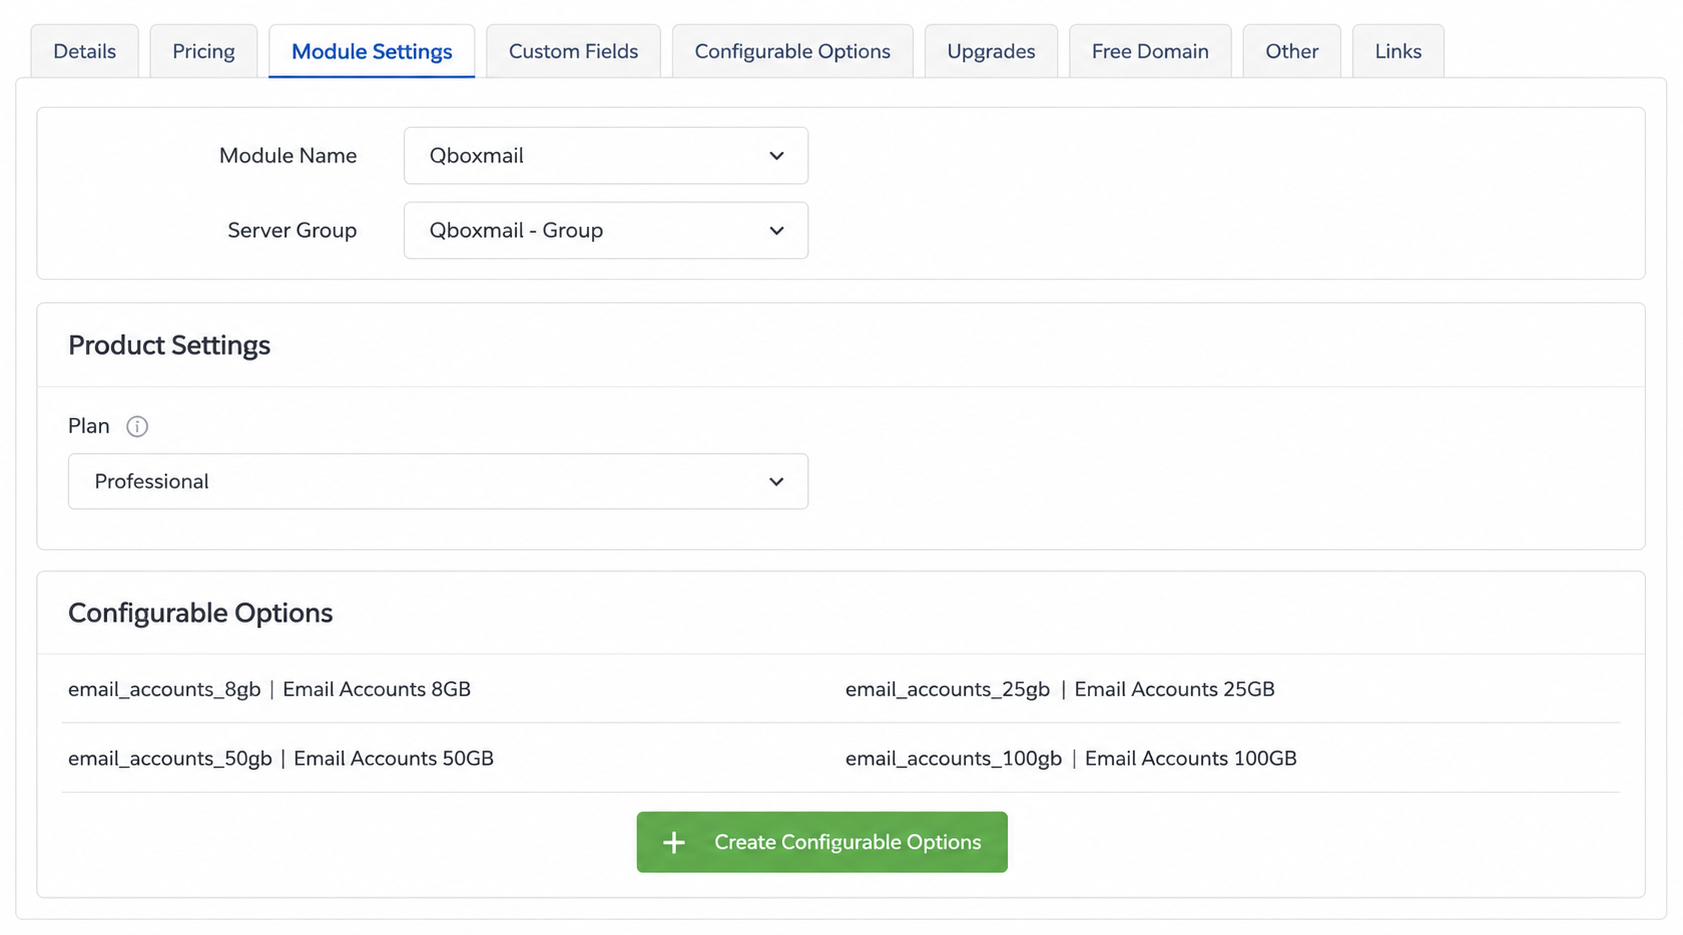
After choosing the plan, click “Create Configurable Options”.
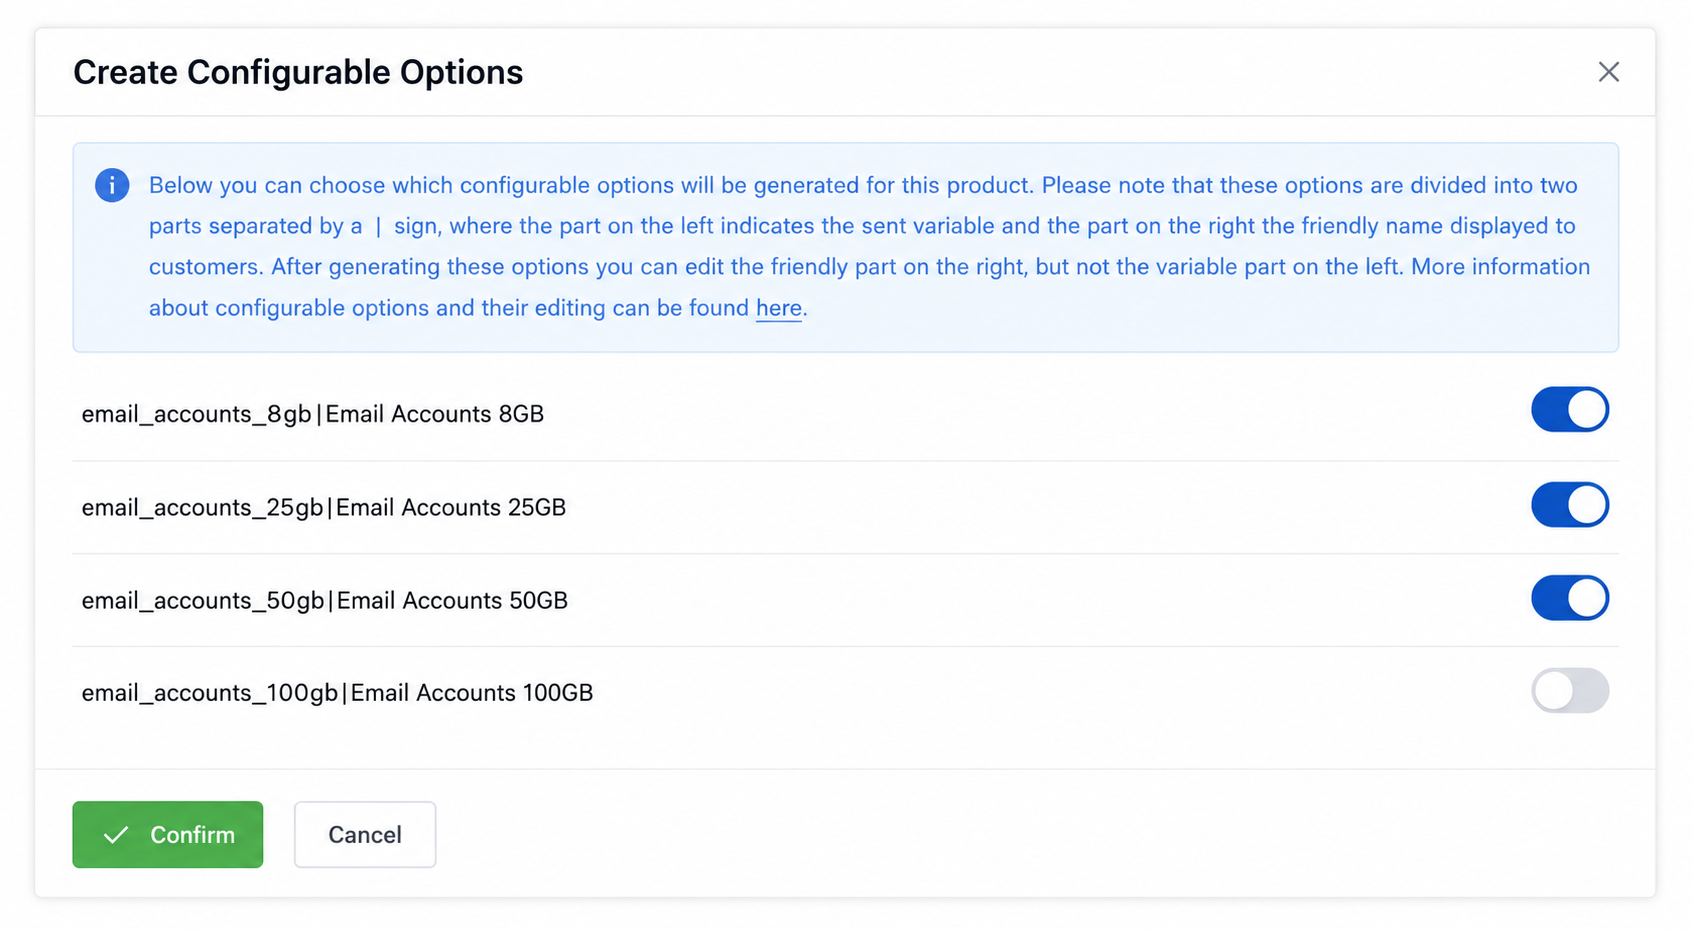
Here you can choose the configurable options linked to the product in question. The configurable options refer to the mailbox sizes that can be activated through Qboxmail services.
It is important to choose** the options compatible** with the selected plan, as follows
- If the product is regulated by the “Basic” plan, select the “Email Accounts 8GB”; “Email Accounts 25GB” options.
- If the product is regulated by the “Professional” plan, select the “Email Accounts 8GB”; “Email Accounts 25GB”; “Email Accounts 50GB” options.
- If the product is regulated by the “Enterprise” plan, select all available options.
In the example, a product in the “Professional” plan was chosen:
When you click "Confirm", you are automatically redirected to the "Configurable Options" tab. Verify that the row for the Product created in step 6.2 is selected, then click "Save Changes".
6.2.2
Now move to the “Details” tab, where you need to check the “Require Domain” option:
Continue creating the product by entering a description that highlights the benefits the user would get from choosing this product.
6.2.3
Move to the “Pricing” tab, where you can choose the billing cycle linked to the product that best suits your sales strategy.
Under “Payment Type”, select “Recurring” and choose your preferred billing cycle. You can select different billing cycles for the same product if necessary; this choice also depends on your sales strategies. To enable different billing cycles for the same product, you must click “Enable” for each billing cycle you want to accept.
At this stage, you do not need to specify the product price because all services provided by Qboxmail are configurable. The price will be entered later, when choosing the configurable options. Check “No” for “Allow Multiple Quantities”.
The rest of the options can be adjusted according to your sales strategy.
6.3 Configurable options
Click Setup > System Settings > Configurable Options
On this page, you can configure products according to the Qboxmail service plan variables described in step 6.2.3.
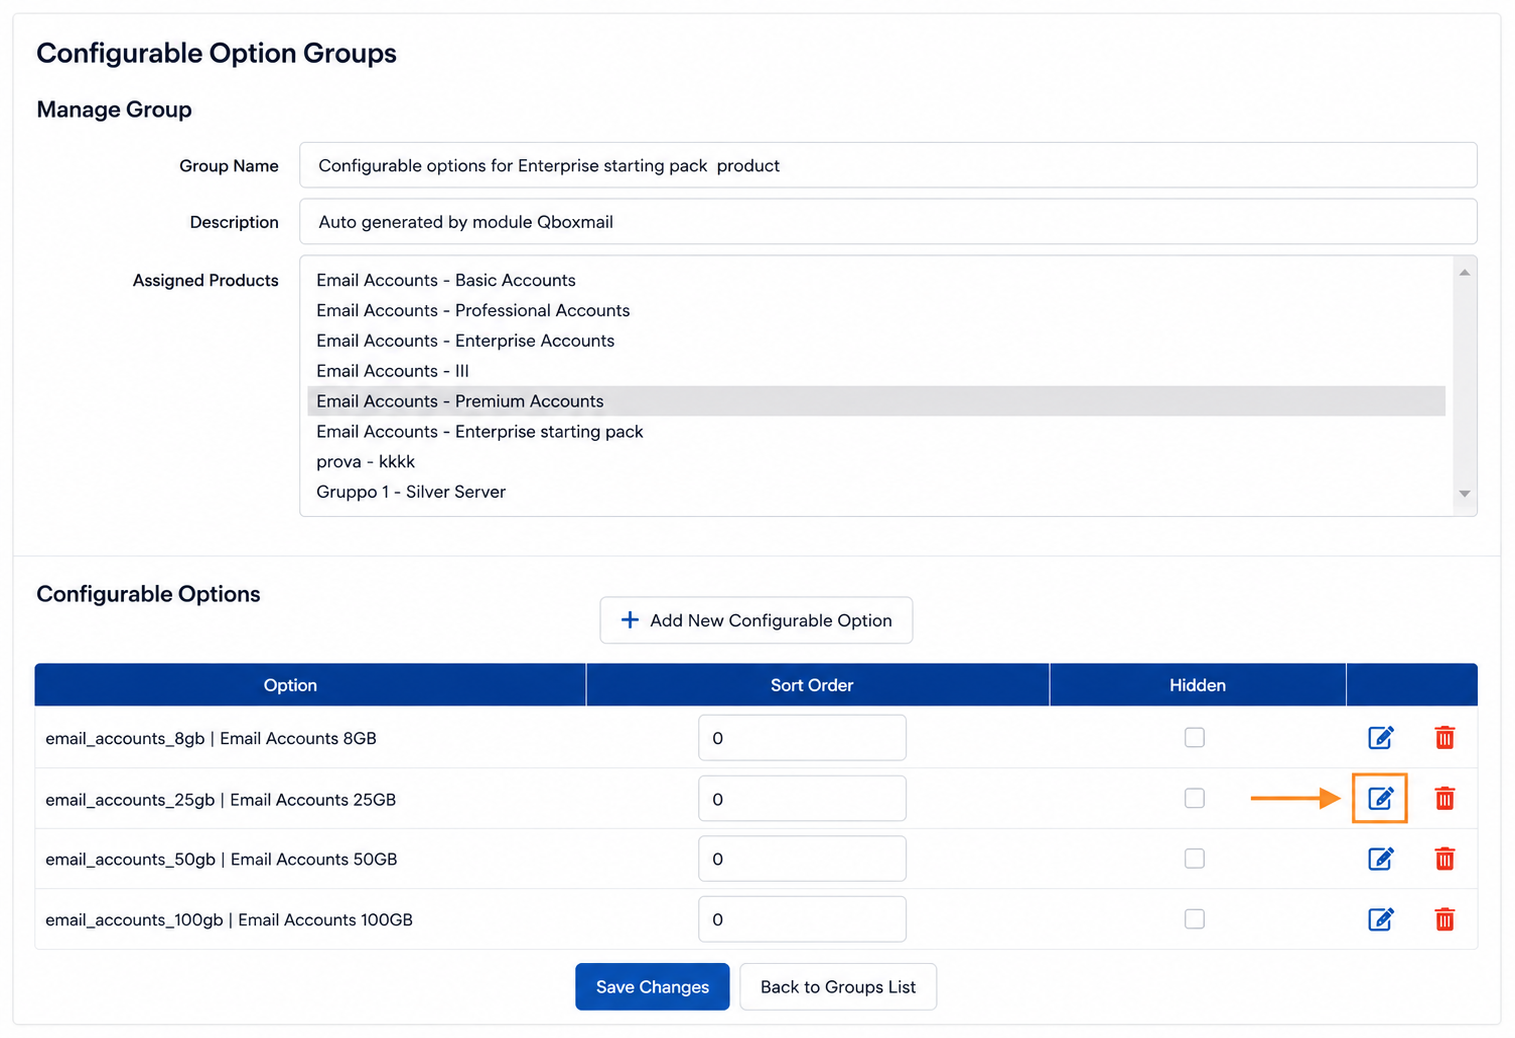
Click the “Edit” button to edit the configurable option of the desired product.
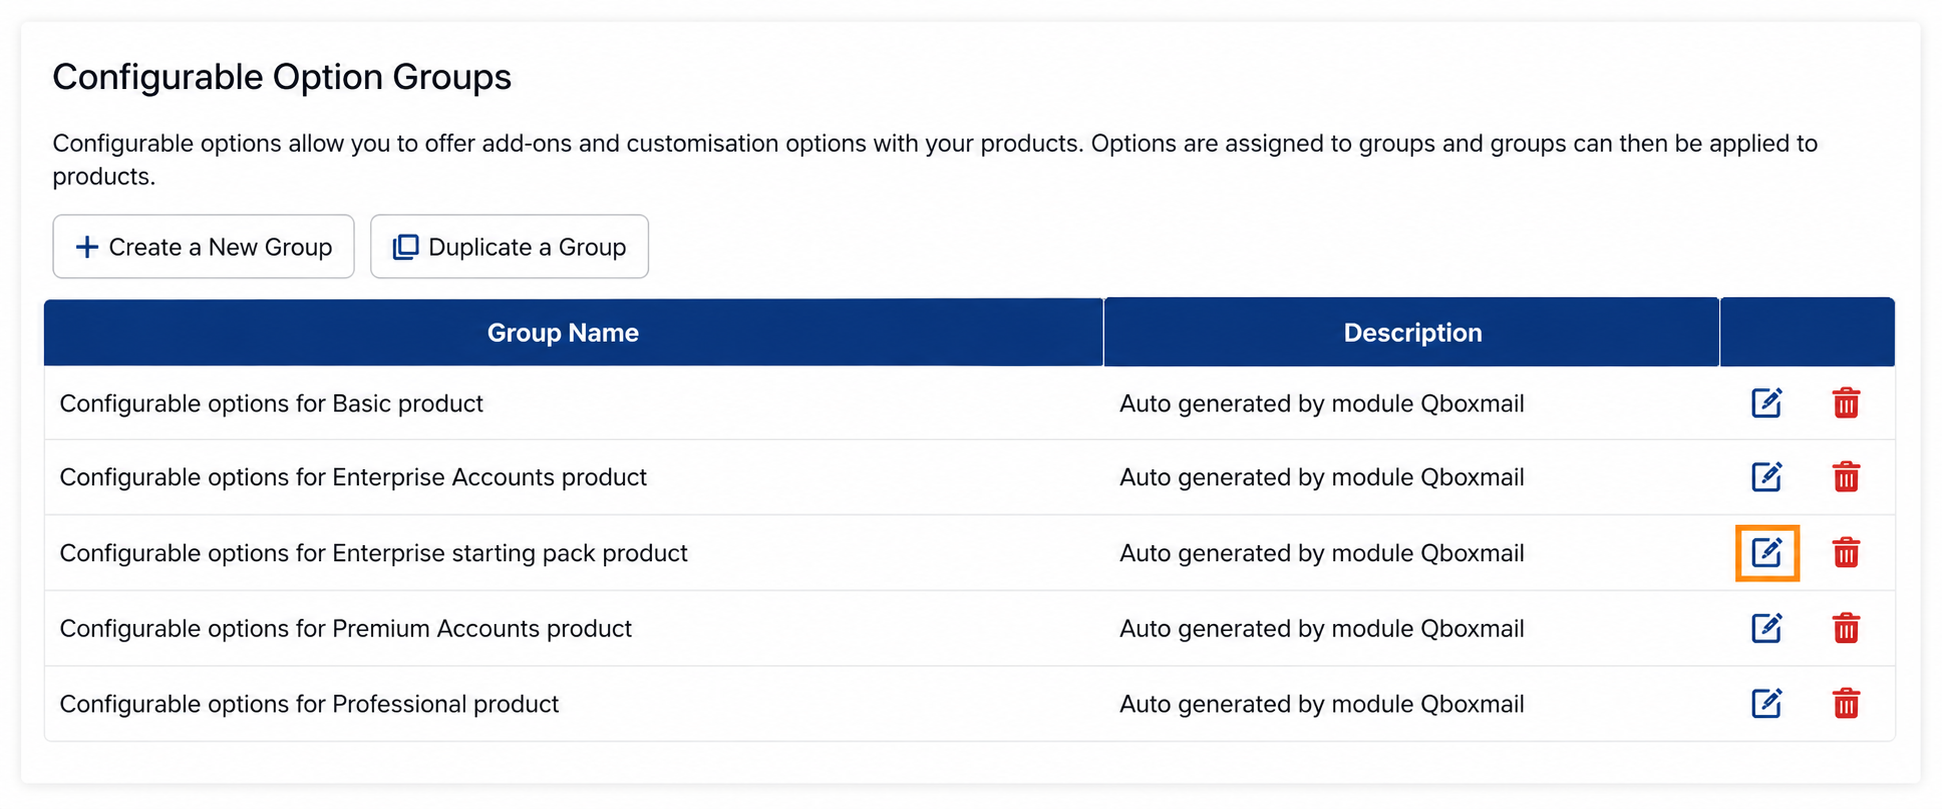
For each product, you can adjust the available configurable options, which depend on the plan that regulates the product. Let’s take as an example a product regulated by the “Enterprise” plan. You will therefore be able to adjust all possible options, because the “Enterprise” plan allows you to activate mailboxes of all sizes available in the Qboxmail service.
Once you have chosen the product whose configurable options you want to edit, proceed to configuring the options.
Click the “Edit” button for the option you want to configure.
The configurations concern:
- The minimum number of mailboxes that can be ordered for a given product (depends on your sales strategies);
- The price of mailboxes for different billing cycles (depends on your sales strategies).
For “Option Type”, choose “Quantity”.
Set the prices for each billing cycle chosen in step 6.2.2.
Set a minimum orderable quantity. The choice depends on your sales strategies.

6.4 Show the product
Once all configurable options have been set and the product is ready to be shown to customers, return to the “Products/Services” section and edit the product in question by unchecking "hidden".